How to use the Apple Weather app on your iPhone

[ad_1]
The iOS Weather application features a helpful way to test on disorders throughout numerous places.

The Weather application developed into your Iphone could not give all the bells and whistles of committed 3rd-social gathering climate applications, but it’s no slouch. Through the Weather application, you can check out the current weather, see the hourly forecast and watch the 10-working day forecast.
The application also shows other sorts of facts this sort of as the air top quality, UV index, wind, precipitation, humidity and air pressure. You can increase other places past your recent one to hold monitor of their climate patterns. A notifications element will warn you to certain sorts of weather, which includes rain and snow.
Apple’s Climate application has benefited from some the latest enhancements. After acquiring the a lot-lauded Dark Sky weather application in 2020, Apple shut it down at the start out of 2023. Even so, several of the attributes from Darkish Sky have considering the fact that been ported to the classic Weather app.
What you are going to want to use the Apple Weather application
The Weather app is constructed into iOS, so you really do not require to obtain it. Should it go missing, you can obtain and set up it from the Application Shop.
SEE: BYOD Acceptance Type (TechRepublic Top quality)
How to use the Apple Weather conditions app
Open up the application for the 1st time and it will check with to use your place. To routinely get the weather no issue in which you are, allow for site sharing while working with the application. The display screen then reveals the existing temperature for your recent metropolis or locale.
Faucet the notification at the base that claims Faucet For Extra Depth. The next monitor shows the projected temperature for the next 10 days (Figure A).
Figure A
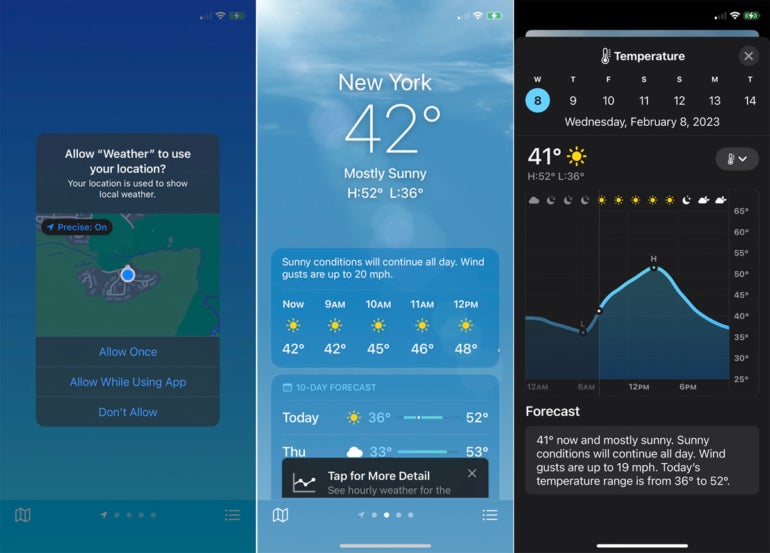
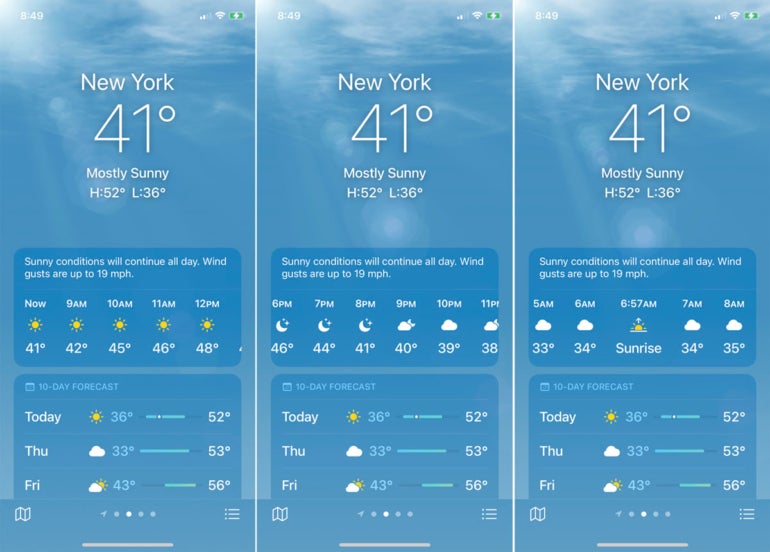
Return to the primary monitor. The best pane shows the expected temperatures and weather conditions ailments for the upcoming 24 several hours. Swipe left on this pane to see the forecast for each and every hour (Figure B).
Determine B
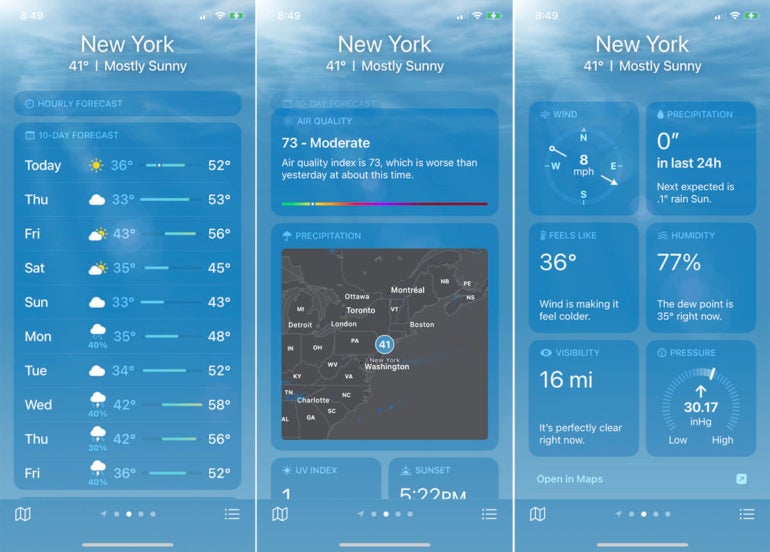
The upcoming pane shows the 10-working day forecast. Continue to keep swiping down to see details on the air excellent, precipitation, UV Index, situations for sunset and sunrise, wind, humidity, visibility and air stress (Determine C).
Figure C
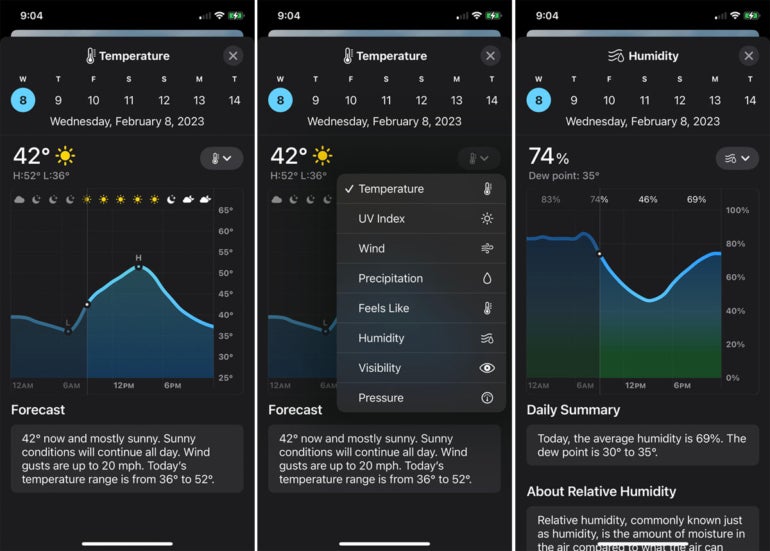
Swipe back again up to the top of the monitor. Faucet on each pane to drill down to the information display to exhibit you the 10-day forecast. From the specifics display screen for most of the panes, tap the down arrow to swap to a diverse issue, these types of as wind, precipitation or humidity (Figure D).
Figure D
To perspective a climate map, faucet the icon in the reduce still left corner. The map shows the temperature in your spot with changing visuals of the 12-hour forecast. Faucet the third icon at the upper right to swap the display among precipitation, temperature and air top quality. When completed, faucet Performed (Determine E).
Determine E

Up coming, you can insert far more towns and areas to the app to keep track of their temperature ailments. Faucet the icon in the lessen ideal corner. At the future screen, faucet the a few-dot icon at the prime and select Edit Checklist. Eliminate any current town that you do not wish to track (Determine F).
Determine F
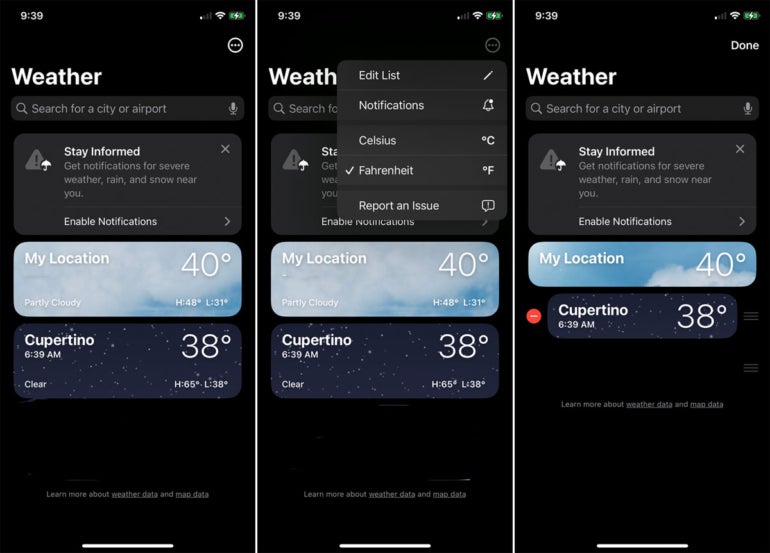
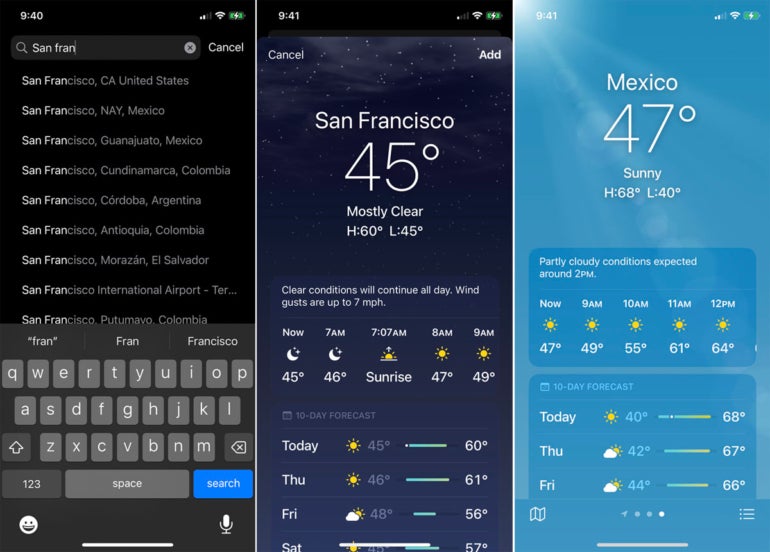
To insert a new town or airport, get started typing its identify in the lookup field at the top and then decide on it from the record. Tap Increase. Repeat that phase for any additional metropolitan areas you want to check out. You are then ready to watch just about every metropolis by swiping still left and appropriate (Figure G).
Figure G
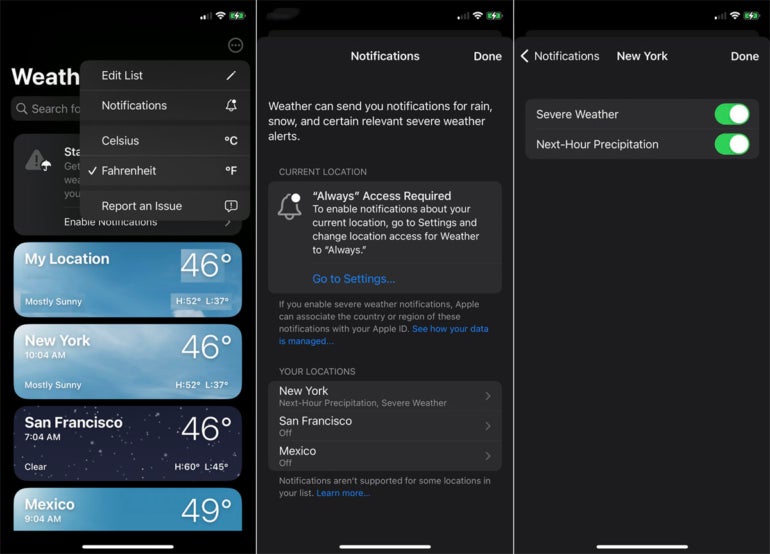
Eventually, you can established up notifications to be alerted to specific varieties of weather conditions ailments. Faucet the icon in the decrease appropriate corner, faucet the a few-dot icon and then find Notifications. Tap Proceed and then Allow to enable Notifications.
Choose a city for which you want to set up notifications and then transform on the switches for Critical Weather conditions and/or Future-Hour Precipitations based on what you want to consist of. Tap Accomplished, and the notifications will show up on your cellphone in the event of all those problems (Determine H).
Figure H
If you are in the temper for extra Apple-related issues, look at out these content articles: How to solve problems when seeking to permit Advanced Details Defense and a look at the MacBook Professional showcasing M2 Professional and M2 Max chips.
[ad_2]
Source website link As technology continues to evolve, so too does the number of apps available to users. One popular and user-friendly app is the Apple Weather app, available on all iOS devices. Whether you own an iPhone, iPad or iPod Touch, you can access and make use of the Apple Weather app, allowing you to stay up to date on daily weather forecasts and trends all around the world.
To get started, head to your device’s home screen and open the App Store. Here, you will find the Weather app nestled among your other apps. Apple recently redesigned the user interface, making it simpler and more intuitive, so you will notice a plethora of colour and dynamic graphical user-interface elements. Once you’ve opened the app, you can begin to customize it in a variety of ways.
First, take a moment to get acquainted with the home screen, which serves as the main hub for all your weather information. Here, you will find an overview of the current temperature and conditions for your location, as well as ideas for activities and wardrobe selection based on the weather conditions. You can also drag down from the top of the screen to receive detailed hourly or daily forecasts.
The Apple Weather app also lets you add various locations to its “Favourites” section. To do so, simply tap the “Favourites” icon at the top of the page, select “Add” from the menu and then type in or search for the desired location. This is a great way to quickly and conveniently check the weather in various places at any given time.
Long press the “Favourites” icon at the top of the page to access additional options. Here, you will be able to customize the temperature scale, specify when and how you receive alerts and turn on the “Air Quality Index” feature.
Finally, the coolest feature of the Weather App is its ability to provide an accurate, detailed 10-day forecast. To access this detailed information, simply tap on the “Hourly Forecast” icon and then look for the “Scroll” option. This feature makes it easy to track the current conditions as well as what is likely to come.
There you have it. Now that you know the basics of using the Apple Weather app on your iPhone, you can make the most of its easy-to-use features and go about your day knowing what’s in the forecast.